
Glueing the Rear Cover Strip
After the front of the forearm had a chance to cure, it was time to move to the back. Attaching the rear cover strip is very similar to the front. I measured the longest half of the joint and cut the cover strip to length. Again, with this being my first armor build, I am going very slowly, so I attached one half of the cover strip at a time.

Completing the Rear Seam
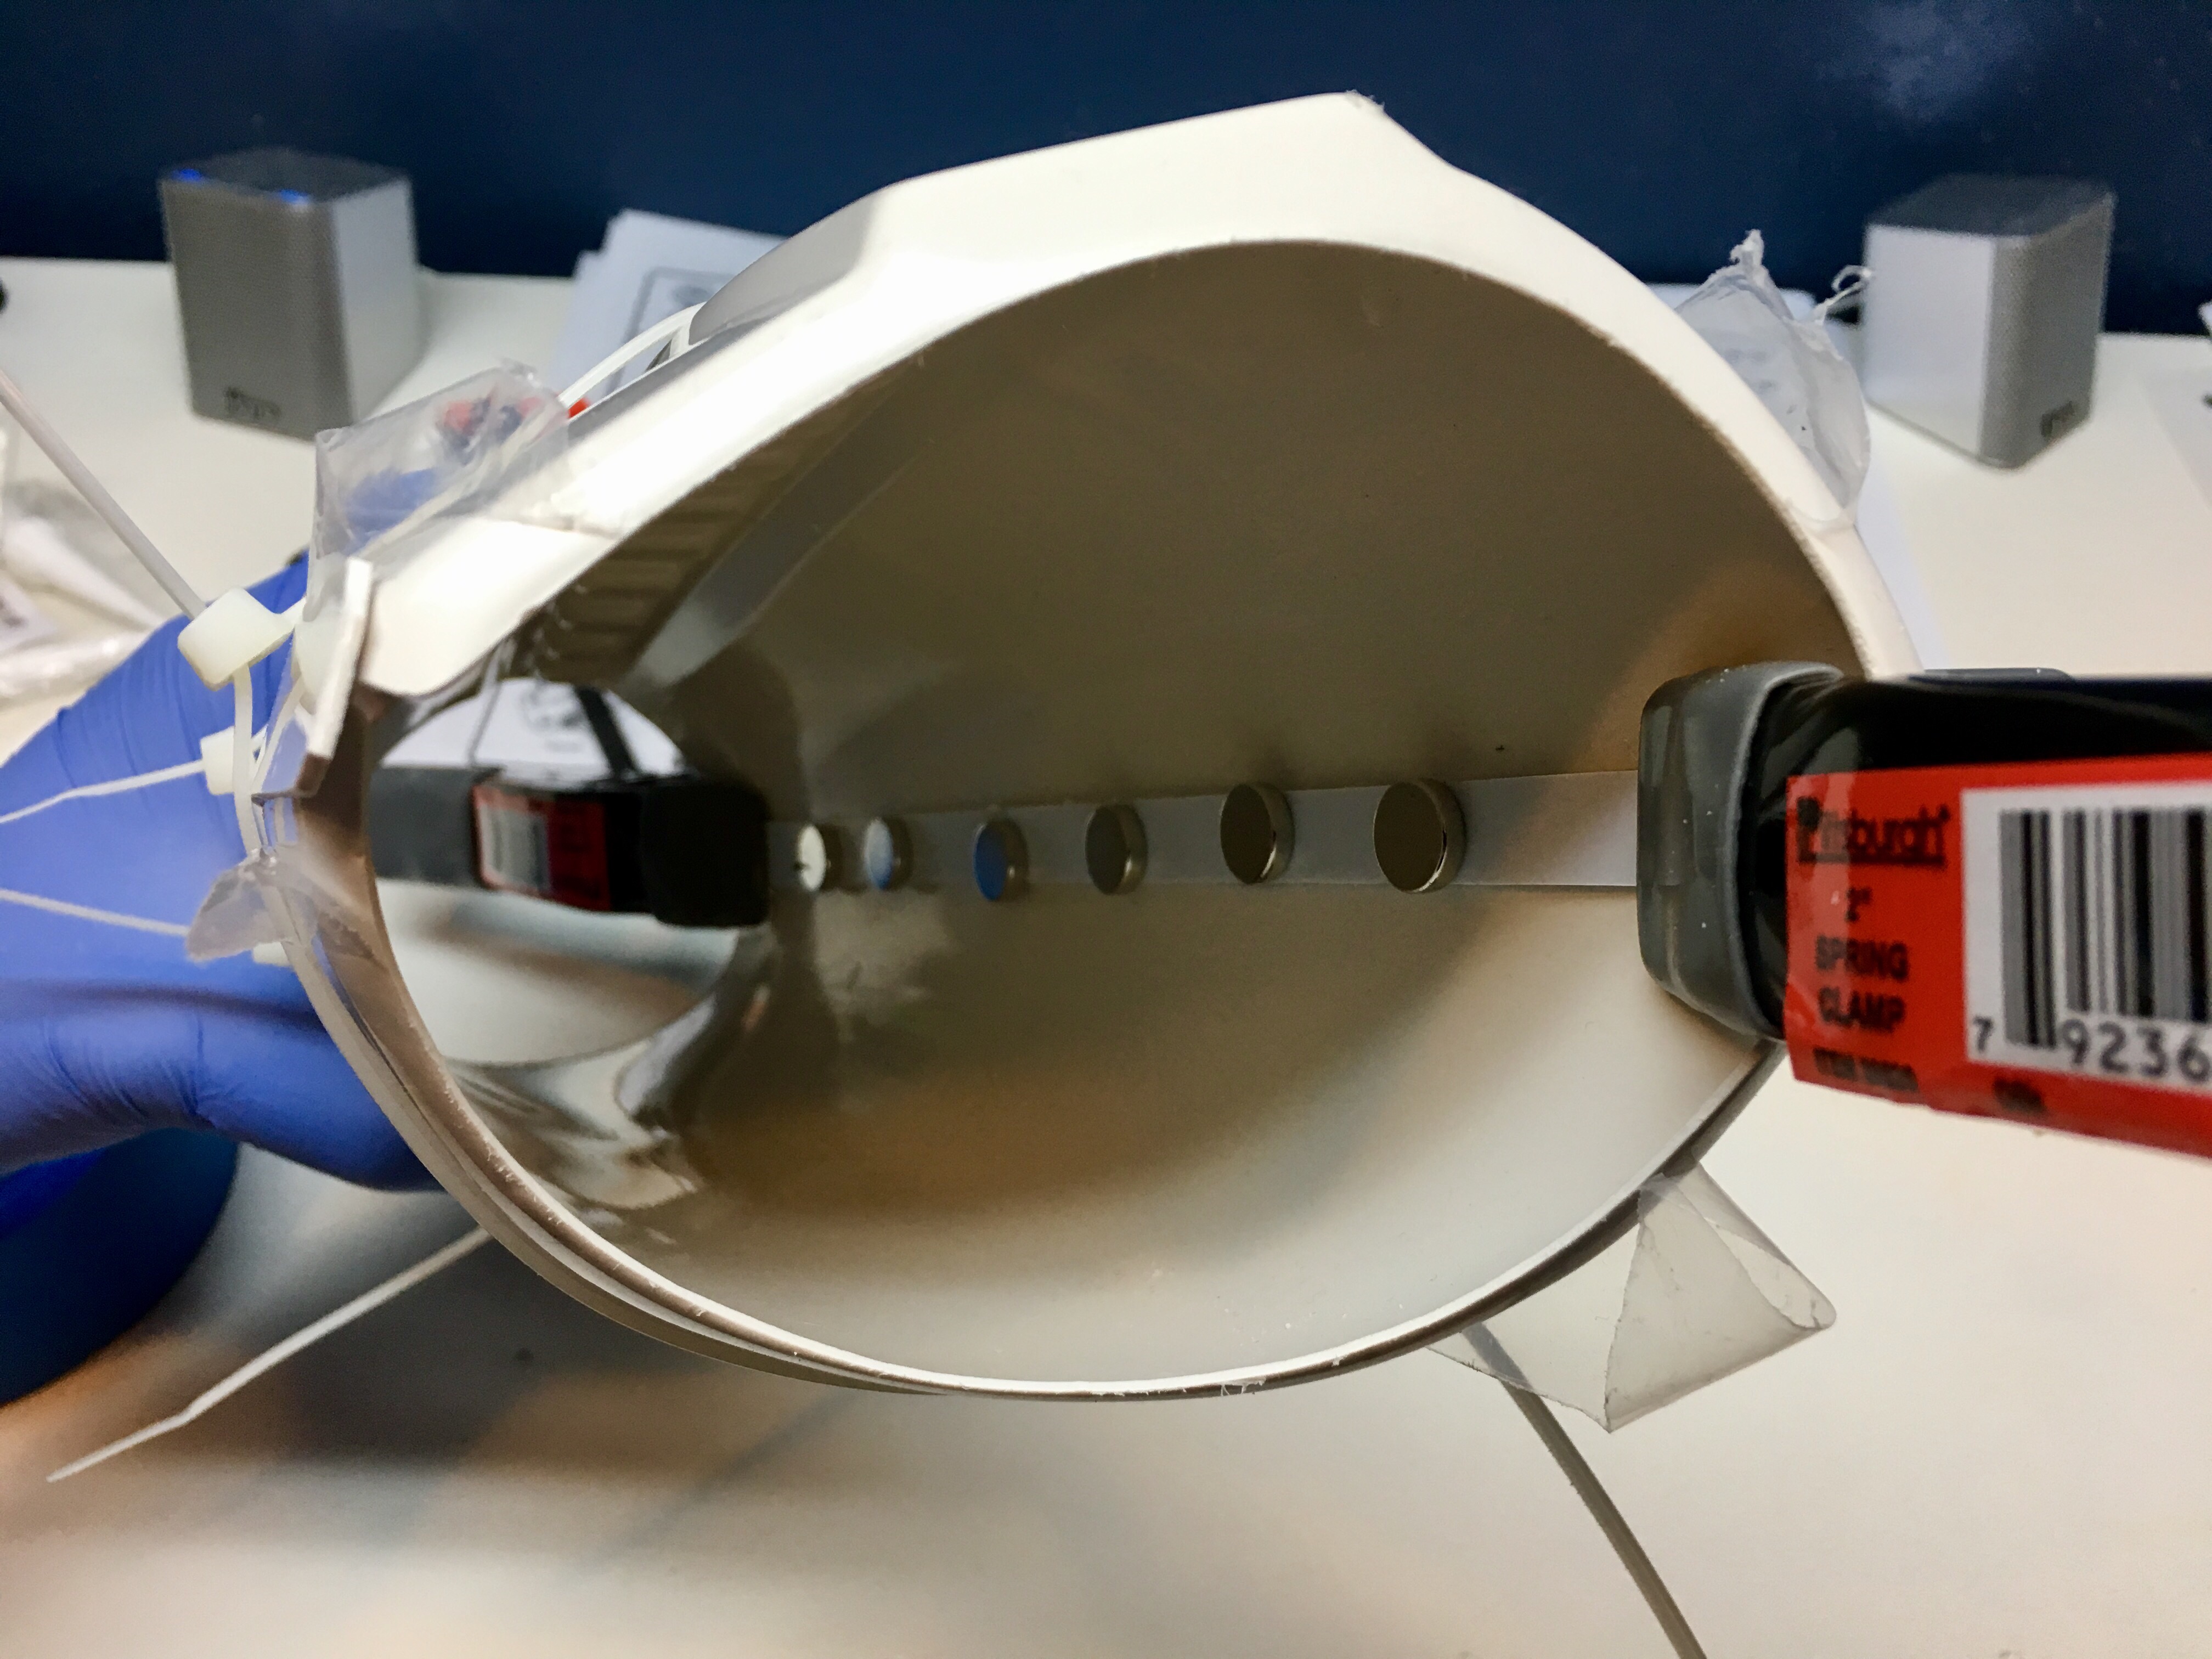
After the first half of the rear cover strip was dry, I moved on to attaching the second half to complete the joint. Similar to the front of the forearm, I used clamps to secure each end of the strip and magnets down the center to hold everything in place. Since the two halves of the forearm are asymmetrical, they didn’t quite line up as nicely as I would have liked. To help secure them together while the E6000 adhesive cures, I wrapped the forearm in some plastic zip ties. And that was it! Both joints of the right forearm were done!
Interior Support Strips
The Anovos instructions call for exterior cover strips only. But since I plan on wearing this costume to various events, I wanted to give the suit some extra reinforcement. For that reason, I decided to install support strips on the interior of all the seams.
To do this, I purchased some white ABS sheets off of eBay. I then measured the interior length of the joint as it will be slightly shorter than the exterior cover strip. I made the interior support strip about the same width as the exterior strip to ensure they bridge both sides of the seam. I then secured it in place with some E6000, clamps, and magnets.
With the right forearm now done, I’ll be moving on to the left side. And since I won’t be needing the right forearm until later, I left the zip ties on and set the piece aside to give the E6000 some additional time to cure.