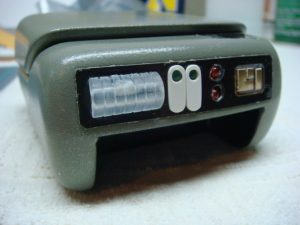
To finish up the kit, I had to add some details to the upper portion of the tricorder. First was the half-round acrylic rod included with the kit. Since the blue LED was protruding from the body, I had to make a small nitch in the back of the acrylic rod to accommodate the LED. After some work with my dremel, I got the piece to sit flush against the body. I then attached it using some Superglue. The last piece of the puzzle was the two white areas around the blinking green LEDs. The kit does state this, but most of the props I’ve seen had some additional detailing here. I decided to add some 0.040″ thick acrylic sheet. I cut out two small rectangles from some stock acrylic, and then rounded the corners using some 400 grit sandpaper. Next, I drilled a hole in each piece for the green LED to poke through. I then carefully bored out the hole using a sharp Exacto knife until the LED was able to fit properly with the acrylic sheet sitting flush against the body. Both pieces were then attached using some Superglue.
And that about wraps it up. I’m fairly happy with how this kit turned out. It was a very easy build, and the instructions were very nicely laid out. I actually built this as practice for my upcoming Mark VII science and medical tricorder projects, so this one will be going up for sale soon. I’ll also be showcasing it on my prop page. I have a new light tent, so I’m eager to try it out.

