More Greeblies
August 4, 2011

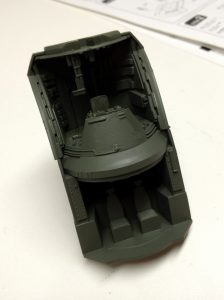
Undercarriage
Having some extra time on my hands, I decided to get some work done on Slave I. I managed to finish the undercarriage, which consisted of adding a handful of small, detailing pieces. While I used the Tamiya thin cement to attach the majority of the pieces, I reinforced them through the mounting holes on the backside with some Testors cement.

Model stand
Having completed that, I finished up by putting together the supplied display stand.
This wraps up the primary assembly. Next, I’ll be moving onto priming, painting, and weathering!
Primer! Finally…
November 27, 2011

Primer
After another hiatus from my workbench, I managed to get back to it with some more work on Slave I. ‘Not too much to report, although I finally managed to get a coat of primer applied.
Since Tamiya primer was recently re-released to the US, I managed to pick up a few cans to give it a try. So far, I am loving the stuff! It goes on smooth and thin and dries quickly. While the model itself was molded in gray plastic, the primer does give it a much smoother look.
The first coat also help highlight some additional work I need to do on the main fuselage in order to blend the seam.
More Sanding and Painting
January 17, 2012

Main seam
After much debate, I came to the conclusion the only way I would effectively remove the visibility of the main seam between the two fuselage halves was to attack it with some heavy duty sanding. Initially, I tried avoiding this approach as I knew it would remove much of the details around the seam including the panel lines and other greeblies. But after applying the initial coat of primer, it’s clear the seam is going to require some additional work that will most likely eliminate these details. So to help me recreate these details after the seam has been addressed, I snapped a few photos of the detailing to use as reference. Following which, I wetsanded the seam using some fine and then extra fine sanding blocks I picked up at Home Depot. I think the seam is starting to look better, but will require some additional puttying and sanding.
In parallel, I’ve also been priming the other pieces of the kit in preparation for painting.
First Base Coat!
April 28, 2012
Cockpit Base Coat
So I’m back to working on Slave I. I applied another coat of putty to the main fuselage seam, and, after some additional wet-sanding, I’m fairly happy with the results. Next up, I’ll have to restore the panel lines I removed during all the sanding, and I’ll also need to put back some of the panel details I removed.
In the meantime, I managed to get the remaining kit parts primed, and even got my first base coat onto the cockpit! It’s been a few years since I’ve used my airbrush, so I’m a little rusty. I especially need to remember to keep the coats of paint thin as I went a little heavy in some areas. Overall, I think it turned out OK.