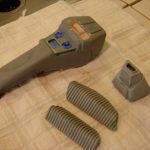
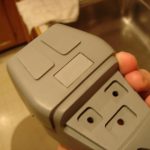
Reshaping the Grips

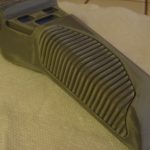
After the primary body work was complete, I gave the two grip sections a test fit. I noticed the upperleft grip did not sit flush against the phaser, so I dunked it in some hot water for a few seconds to soften it up. I then removed it with a towel and held it firmly on the phaser so…


Read more

Sanding

Ok, so now that all the seams, gaps, and holes have been filled in, it’s time to sand. Important note here: Since the body of the phaser has been sealed up, it is very important that you first cover the holes located in the recesses for the buttons. I just used some of Scotch’s blue-masking tape. If you’re building…


Read more

More Body Work

I then used an automotive spot putty and Squadron’s Green Putty to fill in the rest of the gaps throughout the kit. The auto-spot putty is used for larger holes and gaps, while the green putty is designed for smaller holes. The main areas that needed work were around the indicator and the lower access panel. All the Rodd.com…


Read more

Going the Stunt-Version Route

It should be noted that the Rodd.com kit includes a very good set of instructions, and if you’re building the standard version of this kit, you should use them. However, I am building what can be considered the “stunt” version of this prop. The main difference being the “hero” version this kit is designed to replicate and the stunt…


Read more

The Type II Phaser Project

The goal of this project is to construct a replica of the Type II Phaser as seen on later seasons of Star Trek: The Next Generation and early seasons of Deep Space Nine and Voyager. Feel free to click on any of the pictures for a larger (pop-up) version. Since I’m not a scratch-builder first, I’ll start off with…


Read more

Detailing the top graphic

As mentioned above, the last step is attaching the small greeblie on the top array. I gave it a quick test fit to make sure it fit over the protruding LED, and it fit fine. The only fit problem was getting the flat piece of resin to sit flush against the rounded surface of the top array. To remedy…


Read more

Final details

To detail the bottom portion of the tricorder, I first cut a template out of a manila folder. These two pieces will go on the bottom of the main body and flip out door. Once the templates were cut out and test fit on the bottom of the body, I used my hobby knife to cut them out of…


Read more

Time to button up

Now that I had the electronics and battery installed, the next step was to seal up the back panel. I had to do some slight arranging inside the main body to get the battery to fit completely inside, but it wasn’t too difficult. Following that , I just used the supplied screws to attach the door. I had to…


Read more