Graphics

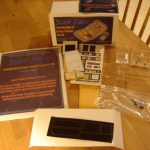
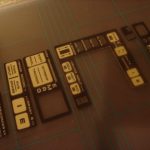
Well since the weather in my area has taken a turn for the cold and rainy, I thought I’d take care of a few odds and ends with the kit. First up, I recently ordered a graphics upgrade package specifically designed for the Mark VI with electronics. I used a sharp pair of scissors and hobby knife to trim…

Read more

Splash Coat

Due to some abnormal weather in my area, it was unseasonably warm, which allowed me to put a splash coat on the tricorder kit. Before I could do that I had to mask off the areas where the LEDs will shine through. Again, the advantage of using a clear body for this kit is because it alleviates having to…


Read more

Puttying the Scanner

I then went over the rest of the tricorder with some automotive spot putty to fill in any additional gaps. After drying, I repeated the sanding process up to 450 grit paper. The instructions then move on to assembling the scanner. Since I’ve already done this, I decided to take care of some minor body work on the scanner….


Read more

Smoothing the Bondo

I let the kit sit for a few days to let the adhesive really dry (also, because I was too busy to get to it). I then mixed up some Bondo automotive filler and applied it to all the seams and screw heads. Be careful not to over-do it, as the Bondo takes quite a deal of sanding to…


Read more

Assembly

Well it’s a new year and the project continues. Now that the holes for the LEDs are done, it’s time to move on to the primary construction. The first step is to sand all four portions of the body with some 120 grit paper on a flat surface. This will remove any of the major imperfections on, what will…


Read more

Starting the Body Work

Next step is to drill the holes for the 4 protruding LEDs on the top of the tricorder. To accomplish this, I first checked to make sure the graphics were properly aligned with the LEDs on the circuit board. Once I did that, I used some tracing paper to create a template of the graphic decal that goes on…


Read more

Getting Started

With any kit, you should first read the instructions through in their entirety. This will give you an overall idea of what you have to accomplish and how each step fits in with the next. After reading through the instructions for the kit, I found that one of the final steps is adding a strip of velcro to the…


Read more

Electronics

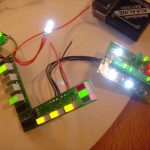
What would a tricorder be without all those blinking lights? Well, in my opinion, very boring. I was fortunate enough to obtain these electronic boards from the same gentleman who made the electronics for the actual Trek series props! He even used the same parts to construct these boards as were used on the the Mark VI tricorders way…


Read more

The Mark VI Tricorder Project

Almost a year to the day I started my Mark VII tricorder project, I’m onto the Mark VI. The Mark VI is actually the predecessor to the Mark VII. It was seen on earlier seasons of Star Trek: The Next Generation and featured a less complex top array of LEDs. Instead, the top of the tricorder housed a small,…


Read more